How to Get Started Planning Nails in Procreate
- Lakeisha Shakes

- Mar 31
- 1 min read
Updated: Apr 15
Procreate is a series of layers & rules. It's so easy to learn!
Let me show you how you can get started planning nails in procreate ASAP without hesitation.
Set up:

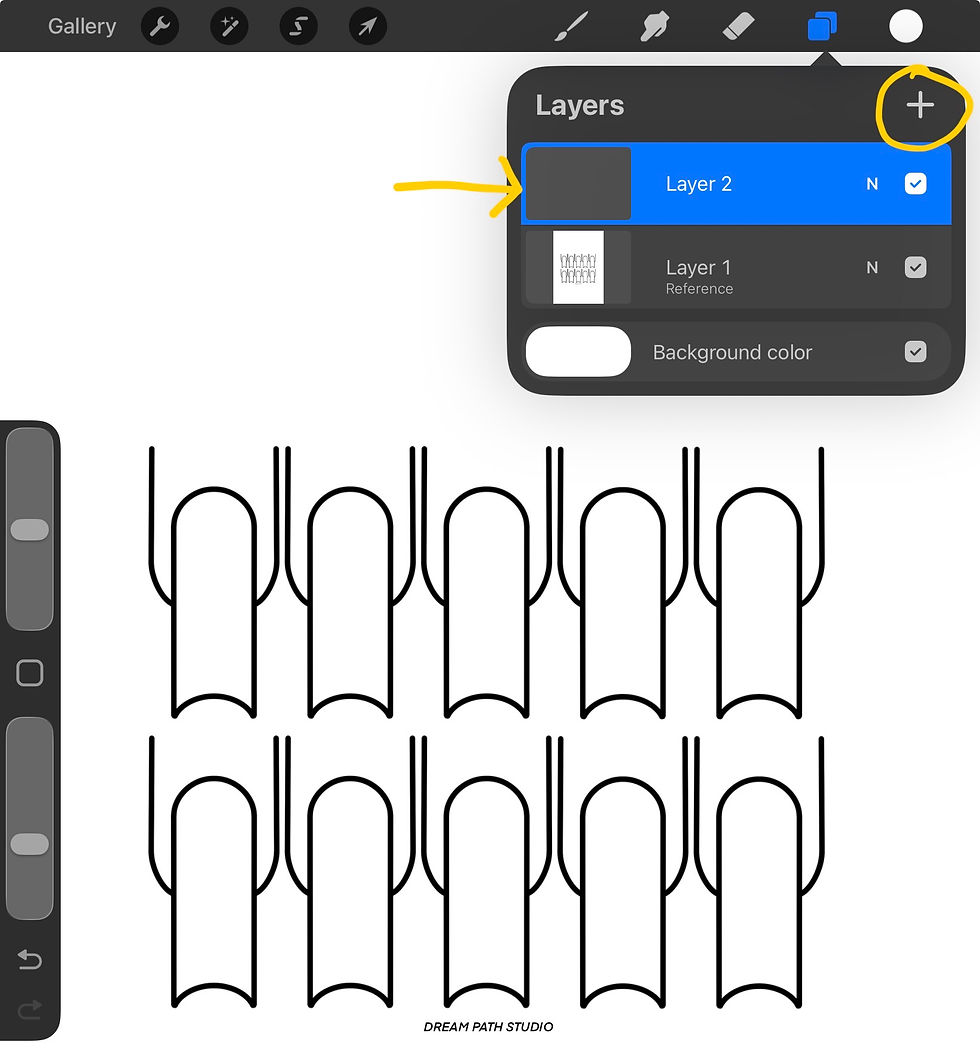

Set the template layer to reference.
Add a new layer by clicking the + button.
On layer 2, drag and drop the colour into the nails.
Designing:


Add a new layer (layer 3) by clicking the + button.
Tap on the layer and choose ‘Clipping Mask’.
Draw whatever you like on layer 3.
That's it.
Rule #1 - Anything set to reference will be “read” by Procreate.
Rule #2 - Everything you draw should be on a new layer. Have your French tips on a new layer, have your glitters on a new layer, have your 3D charms on a new layer, etc.
Rule #3 - Use clipping mask to keep everything neat. All of the layers you'd like to have fit inside the nail shape should have that tiny arrow pointing to layer 2. If you want 3D charms to stick out from the nail, take the layer OFF clipping mask.
The first 2-3 times you do this, it will feel slow but thats called learning. Once you have learned, it'll take you about 15 seconds. Check out some freebies that pair great with nail templates! Happy planning :)


Comments